Setup and configure ModSecurity, a Web Application Firewall (WAF) to detect common web application attacks and add geo-restriction.
A Web Application Firewall (WAF) is a system application firewall that sits between the Internet and your web application creating a shield that filters and blocks HTTP traffic to and from a web server. It can used to block common security attacks targeting your web application such as SQL injection, cross site scripting (XSS), local file inclusion, and many others.
In this lecture note, we will use OWASP’s ModSecurity, an open source WAF, with the Core Rule Set (CRS), which is a set of generic attack detection rules for use with ModSecurity. In addition to vulnerability protection, we will use ModSecurity to geo-restrict access to our web application and prevent users from outside the country access our website. For a more straightforward configuration, we will use the official ModSecurity Docker + Core Rule Set (CRS) images.
Setup/Prerequisites
- This activity assumes that you have an account with a cloud provider (e.g., Microsoft Azure). See this lecture note on how to create an account with Microsoft Azure and other cloud providers.
- Create SSH key pair with a passphrase using
ssh-keygenand upload your public key into the cloud. Please refer to this lecture note for more information. - You need to create a VM instance running Debian 12 (bookworm) and access them using SSH.
- Debian 12
- Apache 2.4
- ModSecurity 2
- Clone the following sample static website.
- A domain name. You can obtain a free
.medomain from Namecheap through GitHub Student Developer Pack.
Step 1: Provision a Virtual Machine (VM) instance
Create a Linux VM instance. The instance type should be the cheapest general-purpose available type by your cloud provider. At the time of writing this activity, the cheapest types are listed in the follow table:
Cloud Provider Instance Type vCPU Memory Azure B1ls 1 0.5 GiB AWS t4g.nano 2 0.5 GiB GCP f1-micro 1 0.6 GB Digital Ocean Basic Droplet 1 0.5 GiB Table 1: the cheapest VM instance types across different cloud providers
Please check the minimum hardware requirements to run the OS image as some images (e.g., Ubuntu) require more memory.
Allow port 80 on the VM instance.
SSH into the VM instance
ssh -i /path/to/private-key.pem username@ip-address
- Update and upgrade system packages
sudo apt update
sudo apt upgrade -y
Step 2: Install apache httpd, php, and deploy the sample web page
- Install apache httpd server
sudo apt install -y apache2
- Install PHP, the Apache PHP module, and the php cURL extension
sudo apt install -y php libapache2-mod-php php-curl
- Install composer, the dependency manager for PHP applications. We will install composer globally as a system wide executable using the following installer script.
php -r "copy('https://getcomposer.org/installer', 'composer-setup.php');"
php -r "if (hash_file('sha384', 'composer-setup.php') === 'dac665fdc30fdd8ec78b38b9800061b4150413ff2e3b6f88543c636f7cd84f6db9189d43a81e5503cda447da73c7e5b6') { echo 'Installer verified'; } else { echo 'Installer corrupt'; unlink('composer-setup.php'); } echo PHP_EOL;"
php composer-setup.php
php -r "unlink('composer-setup.php');"
This should have downloaded the installer to the current directory, verified the installer SHA-384, ran the installer and removed it.
- Next, move the installer into a location available in your PATH environment variable.
sudo mv composer.phar /usr/local/bin/composer
- Test the installation
composer --version
You should see the version number (e.g., 2.7.6)
If you run into any error during the installation of composer, then please refer to the download and installation instructions at https://getcomposer.org/download/
- Install git and clone the web application and install its dependencies
sudo apt install git -y
git clone https://gitlab.com/cpit490/ip-info-webpage.git
sudo mv ip-info-webpage/* /var/www/html
- Build the web app
cd /var/www/html
sudo composer install
sudo chown -R www-data:www-data /var/www/html/
- Restart Apache
sudo systemctl restart apache2
- Test the web page by visiting the public ip address of your VM instance.
Step 3: Install ModSecurity
We will install ModSecurity and configure it with OWASP’s CRS, a set of common attack detection rules. ModSecurity will be configured to accept requests to our Apache web server only from a specific country, rejecting all others. It will also be set up to intercept and log common web application attacks to /var/log/apache2/modsec_audit.log.
- Install ModSecurity
sudo apt install -y libapache2-mod-security2
- Enable ModSecurity
sudo a2enmod security2
- Use the included and recommended
modsecurity.conf-recommendedfile as a starter config file that we will customize and modify:
sudo cp /etc/modsecurity/modsecurity.conf-recommended /etc/modsecurity/modsecurity.conf
sudo nano /etc/modsecurity/modsecurity.conf
Find the line that says
SecRuleEngine DetectionOnlyand change it fromDetectionOnlytoOn. Save the file and exit.Download OWASP’s ModSecurity Core Rule Set (CRS) and configure ModSecurity to use it. OWASP CRS is a set of generic attack detection rules for use with ModSecurity.
cd ~/
git clone https://github.com/coreruleset/coreruleset.git
sudo mv coreruleset /etc/apache2/modsecurity-crs
- Use the CRS example setup.conf file
crs-setup.conf.example
sudo cp /etc/apache2/modsecurity-crs/crs-setup.conf.example /etc/apache2/modsecurity-crs/crs-setup.conf
- Next, we will configure ModSecurity to use the CRS in the Apache configuration file. Open the
security2.conffile:
sudo nano /etc/apache2/mods-enabled/security2.conf
- Find the line
IncludeOptional /usr/share/modsecurity-crs/*.loadand commented it out by inserting#at the beginning of the line.
#IncludeOptional /usr/share/modsecurity-crs/*.load
- Add the following lines to the end of the file before the closing tag
</IfModule>. Please maintain the exact whitespace indentation in the config file:
Include /etc/apache2/modsecurity-crs/crs-setup.conf
Include /etc/apache2/modsecurity-crs/rules/*.conf
Save the file and exit
- Restart Apache to apply the changes:
sudo systemctl restart apache2
If you do not see any errors, then this indicates that the configuration has been successfully completed.
- Test ModSecurity by sending a request that triggers one of the CRS rules. For example, we can send a request that includes
?exec=/bin/bashin the URL, which is a common pattern in command injection attacks:- Open your web browser and visit
http://your-public-ip/index.php?exec=/bin/bash - If ModSecurity is working correctly, you should see a 403 Forbidden response.
- Check the ModSecurity audit log to see the details of the blocked request using
sudo cat /var/log/apache2/modsec_audit.log- You should see an entry for the blocked request, including the matched CRS rule that triggered the block.
- Open your web browser and visit
Step 4: Configure Geo-Restriction
- Install the GeoIP module and the GeoIP database:
sudo apt install -y libapache2-mod-geoip geoip-database
- Enable the GeoIP module:
sudo a2enmod geoip
- Configure the GeoIP module to use the free GeoLite database:
- Open the
geoip.conffile:
sudo nano /etc/apache2/mods-enabled/geoip.conf
- Modify the config file to include the following:
GeoIPEnable On
GeoIPDBFile /usr/share/GeoIP/GeoIP.dat
Configure ModSecurity to block requests from outside your country. However, since we need to test the geo blocking and we do not want to setup a VPN or proxy server, we will block access that is not from the United States country (using the
USISO country code).Open the ModSecurity configuration file.
sudo nano /etc/modsecurity/modsecurity.conf
Scroll to the bottom of a file in the nano text editor, you can use the Ctrl + V keyboard shortcut multiple times. Add the following at the end of the file:
# Configure geolocation database
SecGeoLookupDb /usr/share/GeoIP/GeoIP.dat
# Lookup IP address
SecRule REMOTE_ADDR "@geoLookup" "phase:1,id:155,nolog,pass"
# Block IP address for which geolocation failed
SecRule &GEO "@eq 0" "phase:1,id:156,deny,msg:'Failed to lookup IP'"
# Block non US IP Addresses
SecRule REMOTE_ADDR "@geoLookup" "chain,id:22,drop,msg:'Non-US IP address'"
SecRule GEO:COUNTRY_CODE "!@streq US"
- Restart Apache to apply the changes:
sudo systemctl restart apache2
Now, ModSecurity should block requests from our country and log them to /var/log/apache2/modsec_audit.log.
Visit the web page and make sure your request is blocked.
Now, we know that we can restrict access to a single country, replace
USwithSAto block requests that is not from Saudi Arabia.
# Configure geolocation database
SecGeoLookupDb /usr/share/GeoIP/GeoIP.dat
# Lookup IP address
SecRule REMOTE_ADDR "@geoLookup" "phase:1,id:155,nolog,pass"
# Block IP address for which geolocation failed
SecRule &GEO "@eq 0" "phase:1,id:156,deny,msg:'Failed to lookup IP'"
# Block non SA IP Addresses
SecRule REMOTE_ADDR "@geoLookup" "chain,id:22,drop,msg:'Non-SA IP address'"
SecRule GEO:COUNTRY_CODE "!@streq SA"
- Restart Apache to apply the changes:
sudo systemctl restart apache2
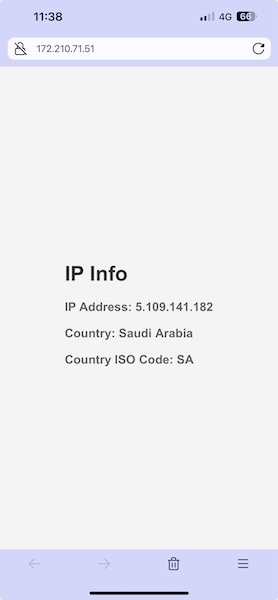
- Now, ModSecurity should block requests not from our country and log them to /var/log/apache2/modsec_audit.log. Visit the web page and make sure your request is allowed.
Limitations
Although integrating a web application firewall into your system, particularly for legacy systems, offers several advantages, it’s important to be aware of some limitations of this approach:
GeoIP Accuracy: The database used in the GeoIP blocking may not be up-to-date or accurate. This may lead to potential errors in blocking wanted or allowing unwanted requests.
IP-based Blocking: Since the GeoIP blocking is based on IP addresses, it may not work effectively against users who are using VPNs or proxies to change or hide their actual IP addresses. However, some VPN clients will add some HTTP headers to the request that contain the actual client’s IP address. These headers could be
X-Forwarded-For,X-Real-IP, or other custom headers. While these can provide useful information, it’s important to note that they can also be manipulated.Performance Impact: ModSecurity, is a web application firewall that inspects every incoming HTTP request which can add latency to the request-response cycle, affecting the performance of your web application.
Submission
Submit a PDF document containing screenshots that demonstrate your completed work.
Extra Credit
Configure Apache to serve a custom 403 page that tells users the webpage is not available in their country.